Simplified Meal Plan Template

With twin first graders in the house and both of us working full time, planning out our dinners, lunches, and snacks is a MUST to save my sanity. But do you ever go to the trouble of meal planning, then when the time comes to get cooking, you just don’t feel like that meal any more? I do that. A lot. But I’ve come up with a solution!

Instead of planning out exactly what gets made each and every day, I make a list of 5-6 dinners, a couple of lunch ideas for in case we don’t have leftovers, a few breakfast ideas, and snack options. I make sure I have what I need on hand to whip things up, and things are a lot less stressful around here come dinner time.

Feel free to use my simplified meal planner to save yourself some time and sanity.

Click the link below to download the meal planner!

Food Themed Planner Stickers

I have a little weekly planner I use to keep things organized. I love decorating with stickers, but they can be so expensive! I watched a few tutorials on Canva, and was able to create my own. Feel free to download and use in your own planner to add some fancy!

I work as a Sensory Food Scientist, which means food is central in everything I do. I’ve included some fun stickers for the types of foods we evaluate at work, and included a few that are relevant to where we are now as a community – masks everywhere! Sunflowers growing wild on the side of the road (my favorite this time of year)! And of course coffee and tea because I cannot function without them. Click on the ‘Download’ button below to print them out for yourself.

Have a blessed week and stay safe!

Josie

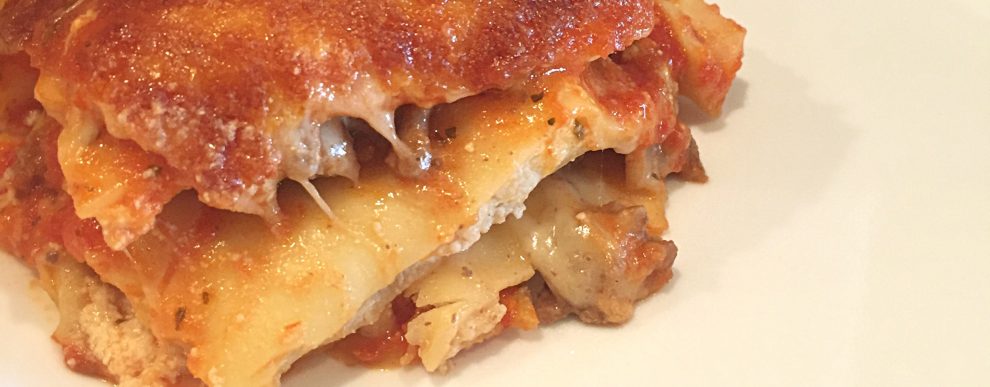
Week Night Lasagna

IMG_0478

The in-laws were coming to visit, and I really didn’t want to cook anything too elaborate.  I have to admit- we were in a rut.  Sure, there are literally thousands of recipes on Pinterest, all recipes, etc. but I just wasn’t in the mood to cook.  I had to grab some cheese sticks for the littles when inspiration struck in the refrigerated section of the grocery store!!  I saw the package of three cheese ravioli in the “family pack”, and I knew what was for dinner.

It only took a few minutes to assemble and was ready to pop in the oven as soon as it reached temperature.  A half an hour later, dinner was done.  And even better than that- dinner was GOOD!  There was just enough left over for my husband and I to take to work for lunch the next day.  Sweet!!

WEEKNIGHT LASAGNA

  • 1 lb ground beef, turkey, or Italian sausage
  • 20 to 24 oz. package refrigerated cheese ravioli
  • 12 oz. shredded mozzarella cheese
  • 24 oz. pasta sauce
  • 2-3 Tbsp freshly grated Parmesan (optional)
  1. Preheat oven to 400*F.
  2. Brown and crumble meat in a skillet over medium high heat.  Drain well.  HINT: this can be done a day ahead.  Just put it in an airtight container and store in the fridge until you’re ready to cook!
  3. Spray an 8″x8″ pan with cooking spray, then spread about 3 Tbsp sauce on the bottom.  Layer ingredients (ravioli, meat, sauce, cheese), and repeat layers.  Sprinkle grated Parmesan on top, if desired.
  4. Bake in center rack of oven until cooked through.  Sauce should be bubbly, and cheese layer nicely browned at the edges, about 30 minutes.  Let stand about 5 minutes (10 is even better), then dig in!

Veggie Corn Dog Mini Muffins


Toddlers are funny little people.  One minute, they’re begging for broccoli and just when you set their plate in front of them, THEN they ask for cake.  My little miss LOVES cupcakes.  She calls them pancakes, but I know what she means.  My little mister LOVES ketchup and will dip anything in it- even apples.  And he loves hot dogs.  They also have days where they eat hardly anything, and days I’d swear they had hollow legs!  Well, today they ate four of these mini muffins, each.  And that’s a LOT for a little tummy.  They both said, “yum!” and little miss even said the ‘pancakes’ were ‘so pretty’.  She’s got good taste!

This recipe is easy to pull together, takes literally 5 minutes to assemble, and tastes great to boot!  I hope you love them as much as we did.  They also freeze very well!  Perfect for those crazy week nights!

Veggie Corn Dog Mini Muffins

  • corn bread muffin mix that makes 6 regular sized muffins (I used Marie Callendar’s)
  • 1/3 cup milk
  • 1 large egg
  • 2 Tbsp butter, melted
  • 1/4 cup finely shredded carrots
  • 1/4 cup finely shredded zucchini
  • 2 hot dogs, chopped
  1. Preheat oven to 400 degrees F.  Lightly spray 20 of the cups in your mini muffin pan.
  2. Make corn bread according to package directions, using milk, egg and butter.
  3. Place shredded veggies in a clean towel or paper towel and twist/squeeze to get some water out.  Stir into corn bread batter.
  4. Dollop about 1 tsp batter into each of the 20 greased cups.  Use your clean finger or spoon to even it out in the cup.
  5. Add about 1 tsp chopped hot dog on top of the batter, then top that with another tsp of batter.  If you have some left over, just distribute it among the cups.  Use your clean finger or a spoon to make sure the hot dogs are covered with batter.
  6. Place in preheated oven and bake for 10 to 15 minutes, or until sides are golden brown.  
  7. Let cool about 5 minutes, then remove from pan to a cooling rack.  Serve warm with ketchup and/or mustard.
  8. To freeze, let cool to room temperature, then place in a zip top bag and remove as much air as possible.  Freeze for up to 3 months.  Reheat by baking on a foil lined and lightly greased tray at 400 for about 10 minutes.

These would be great chili toppers, too!!

Ham Hocks and Beans

  
Just because I can see the sun doesn’t mean I can feel it.  It’s that time of year!  Well, if it can’t be warm and toasty outside, I can get warm and toasty inside.

This is the kind of soup/stew that puts a fire in your belly.  Not the kind that has you reaching for the Tums, but the kind that warms from your belly to your toes.  The kind that makes me want to sit back, sigh with contentment, and get out a good book.  Or, more realistically, gives me the energy to chase around two toddlers.  

Wishing you warmth and a full belly!

Ham Hocks and Beans

  • 1 lb pinto beans, rinsed well and picked over
  • 2 Tbsp oil
  • 1 onion, chopped
  • 3 stalks celery, chopped
  • 1 bell pepper, chopped (I used red)
  • 2 jalapeños, cut in half lengthwise 
  • 2 tsp cumin
  • 1 tsp baking soda
  • Chicken stock (or water)
  • 3 smoked ham hocks
  • 1 can (14.5 oz.) diced tomatoes
  • 1 cup shredded carrots
  • Salt and pepper to taste
  1. Place rinsed beans in a large bowl or pot and fill with water until it’s about 1 inch above the beans.  Let sit at least overnight.
  2. The next day, drain the beans and set aside.
  3. Add oil, onion, celery, and peppers to a large pot and cook, stirring often, until veggies are translucent (about 5 mins).  Add cumin, baking soda, and enough chicken stock to cover the beans by about an inch.  Nestle in the ham hocks, and bring to a low simmer. 
  4. Cook low and slow, stirring every so often, until beans are soft.  This will take a couple of hours, so add chicken stock as needed.
  5. Once beans are soft, discard jalapeños, and set ham hocks to the side to cool.  Stir in tomatoes and shredded carrot.
  6. Once cool enough to handle, remove meat from the ham hocks and return the meat to the pot.  Cook an additional 10 minutes or until the carrot is soft.  Add salt and pepper to taste.
  7. Enjoy with a glass of wine and a good crusty bread.  Cheers!